16 June 2004
 I am starting to get the sewing itch again so this is going to be my new project. While I am enjoying the middle class Dutch stuff that I am doing, and there is still plenty of research to do there, I am also feeling the need for another court frock. Rowany has a Baronial changeover at the end of the year and I would like a new frock for the event, so I may as well start planning it now. I’ve been tossing around the idea of doing a Tudor from the 1530s, as I like the style and want to try out a few theories discussed on MedCos and was still considering various paintings for inspiration when I re-discovered this painting.
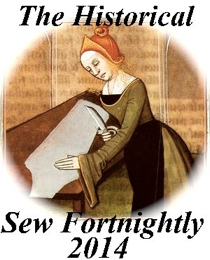
The painting is “Triptych of the Micault family” by Jan Cornelisz Vermeyen. A copy of the full painting can be found at the Web Gallery of Art.
The Web Gallery of Art’s description of this painting states that Jean Micault was the collector-general of Charles V and he is shown wearing the mantle of the treasurer of the Order of the Golden Fleece. Hence the family would have been members of the Hapsburg court in the Low Countries, thus fulfilling my desire for a court frock.
The figures in the back, of the daughters of the Micault family are the ones that interest me the most. The mother is wearing a fairly typical Dutch dress of the time, while the daughters are wearing dresses that are very similar to Tudor dresses of the same era. The bodices are structured and straight, the partlets are high necked with a small ruff, the sleeves are turned back with a white undersleeve showing, the skirts are open at the front showing an underskirt and they appear to be wearing French Hoods.
Further analysis of the painting raises some questions about the difference between English and Dutch fashions. The bodice of the second daughter appears to be a little curved through the bust area, is this because the corsets were not stiff? Or were they not wearing corsets, but perhaps a fitted kirtle or a corded corset? Are they wearing farthingales, it’s very hard to tell from the painting. How are the partlets constructed? Are they one layer or two?
For the moment I am going to construct based on “traditional” Tudor lines, i.e wear a corset and a farthingale. Mostly because I already have a corset that needs adjusting and I won’t do this unless I have a reason to, and I’ve never worn a farthingale, so would like to try it out. If I don’t like it I can always (unless further evidence is produced!) claim that the dresses don’t have farthingales-although would this need a different cut in the skirt?
Tasks: Make farthingale, based on Hunnisett’s pattern, fix corset, start saving for the fabric, make black hat (I’m going to do this style rather than the French Hood), restring my pearls, think about partlet construction.
15 July 2004
Well it’s been a busy month, but unfortunately I’ve done little work on this dress. My corset now has straps mostly sewn to it, and that’s about it. I’ve been busy reading and researching for the Elizabethan man’s garb that I am making for my partner. I’ve also been reading about Renaissance seam treatments and discussing them at MedCos. While it’s been an interesting and useful discussion I think I’ll make this dress in the way I am accustomed to, i.e by bag-lining it, and try out the new seam treatment ideas on the Elizabethan man’s garb, and my Apprentice Frock-off project. Next step: Clean up my sewing room, so I can get the blasted dress started, then read Hunnisett and Alcega and make a farthingale.
5 October 2004
I think this must be the world’s most procrastinated over farthingale. It was cut out over a month ago and stitched together. It then sat on the floor of my sewing room while I got bents (10mm cane) and fabric to create the channels and generally just ignored it in favour of other things. I started all the channels three weeks ago, then had to unpick them, take 10cm out of the front and back of the skirt as it was too big, restitch the channels and cut the bents to size. On Sunday I put it on for comment by my Laurel and the other members of our sewing group. It is mostly OK, and so should be finished this week. Yay! I just need to splice the bents so they form a circle rather than a pointy egg, which is its current unattractive look, and then stitch the channels closed and gather to a waist band. Easy! Or so it seems at the moment.
I have bought the fabric for the undersleeves and the forepart of the underskirt, a white brocade with small diamonds spaced regularly throughout it. From a distance the fabric will look white, but this suits me as I don’t want this dress to be busy, I want it to be something that is admired for its simplicity. The brocade has a very soft hand, so I will need to back it with something to create the stiffness for the undersleeves. Although as the sleeves are not very bulky this could probably be achieved with a stiff lining rather than a canvas interlining.
7 October 2004
I’m contemplating the various layers of this dress at the moment, specifically the skirts. The farthingale is almost made-first hoop finished last night, two to go. So now I need to think about petticoats and the kirtle/underskirt. The shape I want to achieve with the skirts is like this dress or this one both made by Ninya Mikhaila for Hampton Court Palace. This looks to me like a lot of cartridge pleating through the back and a flat front, but what goes underneath it? The layers I am going to need are: the farthingale, a petticoat, the kirtle skirt and the over dress’s skirt. The kirtle skirt and the overdress’s skirt will be pleated in this fashion, but what about the petticoat? Should it be an simple A-line skirt, a tube cartridge pleated into a waist band, or something completely different? The fronts look quite flat so it probably isn’t entirely cartridge pleated, now I need to decide whether it is pleated in the back or not.
At least after tonight I’ll have a dress dummy to put these skirts on to try out the different effects.
18 October 2004
I have underwear! Corset-finished, farthingale-finished, petticoat-finished. It was cold and rainy in Sydney yesterday so I sat in the lounge room with my dress dummy and finished stitching in the bends on my farthingale and then used the dress dummy to pull the petticoat through the waist band to the correct height.
Synopsis of the two items:
The Farthingale: Fitz and I spliced the cane bends between us. He was in charge of cutting and holding them together while I was in charge of wrapping many layers of sticky tape around them until they held. Probably not the most authentic treatment, but it was what we had to hand and it works-at least in the short term. We averaged about one bend every 5 days. In the midst of this I had to re-sew the waist band. In case you ever want to machine sew something onto a farthingale after the bends have been put in-don’t. The neighbours must have thought I was very strange (my sewing room is at the front of the house) with my sewing machine as close to the edge of the table as possible and a great white thing being propped up by my shoulder. It’s amazing that it didn’t all go haywire! Just a little more tension than normal pulling the fabric away from the foot. The channels that the bends were going into also needed to be unpicked so that we could get enough grip to pull them together, hence the hand sewing on the floor yesterday afternoon. I managed to get a free dress dummy from a friend last week which was very useful for hand finishing the channels. After pinning the farthingale to the dress dummy it took all the weight and need to manouver the large stiff circles out of the operation and left me with some simple stitching at eye height when sitting on the floor.
As the ABC’s Sunday afternoon arts program was on I sat, stitched and listened to enjoyable TV. I’m mostly happy with the final result. The hem of the farthingale wasn’t set properly so it is higher in the back than at the front. After trying on the petticoat over the top of the farthingale I don’t think this is a major problem. It can be easily fixed if it is. The top two bends have a definite join in them which is visible as a lump in the bare farthingale. This concerned me. However the petticoat again fixed this problem as they are not visible once the farthingale is turned inside out and the petticoat is worn on top. Hhhmmm, good cotton hides a multitude of sins.
The Petticoat: After the deliberation which began with my last diary entry I finally decided to do a simple tube shaped petticoat knife pleated to a waist band. This decision was again made with reference to Hunnisett, although ultimately it is a very simple design. The fabric for the petticoats came from some old cotton sheets. My Grandfather recently passed away and my Grandmother had already pre-deceased him, so as my Mother and Aunt were cleaning up their house they decided that all the good white cotton sheets that Nana had owned were to be given to me to make chemises from. These are really good thick cotton sheets, and so were too stiff for chemises, and I wasn’t really comfortable accepting them for this purpose, but it is sometimes easier just to agree to the ideas of my Mother and Aunt and work from there. They would have made bad chemises, however they are perfect for petticoats. This petticoat has enough strength and body to stand away from the farthingale, rather than limply clinging to it. I’m planning on using one more sheet (I inherited a total of 8) as the base for the false kirtle skirt.
Actually these two items are not yet completely finished, I still need to add hooks and bars so that they will stay closed-but that’s a minor thing. Right now I’m celebrating the fact that the procrastination period is over and my underwear has been made on schedule. Yay!!
The other thing that I started and completed in the last week were the white undersleeves. As this dress will be worn in the middle of December in Sydney I was never going to make a kirtle to be worn under it, although this would be the correct thing to do. Wearing velvet in Sydney in summer is madness enough without adding another three layers of fabric for the fun of it. Hence the undersleeves were going to need to be false ones. After looking through Holbein’s portraits of Tudor women, and referring to the orginal picture, I chose to again refer to Hunisett for the pattern. Three hours worth of work later they were finished. Nice and easy! The off cuts of the cotton sheets from my petticoat were used as the lining and as patterning fabric, and the outer is the white brocade mentioned previously. I used three flat pearl buttons with a gold rim to keep them closed. I’m not yet sure about the buttons as I think white on white may be too easily lost, but they are buttons and can be easily replaced when the dress is coming together. I’m going to put false puffs into the sleeve as I find it tedious to be continually pulling chemise fabric through each sleeve puff. Then attach cords to the top of the each sleeve and lace to points in the finished dress. Voila!
I have declared this weekend to be “mad frock making weekend” so the plan is to have the forepart skirt finished by next weekend, and Fitz’s doublet mostly finished as well. As well as this I am going to buy a disposable camera and take pictures of my work, so look out for some long entries and new photos next week.
26 October 2004
The “mad frock making weekend” was not as productive as I had envisaged, although I don’t think that they ever are. Personally I blame all those friends who tempted me out of the house with offers of coffee and cocktails. Well maybe I really enjoyed spending time with friends and don’t blame anyone at all.
I got most of the forepart skirt done, except for hand finishing the side of the forepart where it attaches to the petticoat, and stab stitching the hem to keep it flat. The doublet is nowhere near as finished as I was hoping, but you can read about that in the Elizabethan men’s diary.
Overall the creation of the forepart petticoat went very well. It is a tube of cotton, I cut up some more of my Grandmother’s sheets, 3.2m in diameter which is pleated to a waistband. A rectangle of white brocade fabric, 108cm by 91 cm, was sewn onto the petticoat before it was pleated, and a band of brocade, one handspan wide was also sewn around the bottom of the skirt so that if ever my overdress lifted away from the ground it would look like the entire skirt was made of the brocade. This also allowed me to easily finish the hem, as I machine stitched the right side of the brocade to the wrong side of the petticoat and then turned it through to secure the border. This was then turned over at the top and machine stitched again, as no-one is likely to see this part of the petticoat.
Pleating the skirt onto the band was the most problematic part of the construction. I wanted to keep the front of it flat and pleat the rest in towards the back, but 3.2m of fabric was not going to be easily pleated into a 70cm waistband. On Saturday night I tried four different ways and was eventually told to put it down by the friend I was sewing with as it was late and obviously I wasn’t thinking properly. The next morning it was all OK, I pleated 6cm to every cm and then foled each pleat over the over the other in a direction away from the front and sewed it down twice. It seems to work and I am happy.
This evening I’ll have an underwear parade. My sewing friends, including my Laurel who’s expert in Tudor clothes, are coming over and so we’ll make sure that the entire ensemble is working and take some photos. Then perhaps pattern the bodice. Depends how much time we have.
Now for the stocktake:
Completed:
- Corset
- Farthingale except for fastening and bias tape around edge
- Petticoat except for fastening and bias tape around edge
- Forpart except for handstitching an edge of the brocade to the skirt, fastening, bias tape around edge, plackett finishing and stay stitching the hem.
- Undersleeves, except for stitching ties onto them and stitching in false puffs
- String of pearls
Still to be completed:
- Overdress, decide on fabric to line sleeves with, pattern and construct bodice and sleeves, line hem of skirt and pleat it.
- Ruff
- Partlet
- False plaits for hair
- Put feathers onto flat cap
3 November 2004
The results of the fitting last week:
My farthingale is OK, once I put a fastening on it will be finished. The petticoat needs to come up one more hem length, so I might re-sew the cord channel, albeit slightly smaller and go with the original corded petticoat idea. The forepart petticoat needs some work. It was too short; one really should not set hems on a leaning dummy! And the forepart was bagging in a strange way. To fix this we unpicked the entire forepart and I will re-pleat the petticoat to the waistband and add 2-3cm to the waist band to drop the petticoat to the floor. The forepart will then be sewn over the top of this to reduce the bagginess, as for some reason I had enough fabric in the forepart but not in the petticoat, despite the fact that Ii’m sure they were the same length when I cut them. Oh well, it’s not a real frock unless a major seam has been unpicked- at least I don’t have to bleed on my dresses to make them real, contrary to popular costuming belief. Also my friend Helen has offered to be my dress dummy for this part, as we are the same height at the waist which means I won’t have to deal with the issue of the leaning dress dummy just yet.
I also removed the ties from my bum roll and replaced them with petersham tape and a skirt fastening. Previously the ties had a habit of loosening through the day and they just felt wrong. This will fix it. And it’s something I’ve been meaning to do since July last year.
26 November 2004
I think I have had a sewer’s block all month (similar to a writer’s block, rather than a patterning term) I’ve not been able to muster the interest to do much sewing and what I have done has been problematic. This dress has not progressed much since the 3rd. I unpicked the forepart and added a waist band of three inches to see if the skirt would drop. Then it sat around my house for a few weeks. I was finally has able to try it on in company last weekend and it’s still too short. This means that I have had to unpick the entire forepart and hem guard and I will need to add 2 inches to the hem, and then re-sew the forepart at the hem in preparation for shaping. All with 2 weekends to go before the event, and I’m spending this weekend in Yass, away from my sewing machine. Eeek, I’m doomed!! Actually it’s probably OK, I’ll just need to put in a lot of work over the next two weeks. The bodice should be patterned early next week and I’ll purchase the fabric on Monday. As I have taken a week off work I probably have enough time to make a simple non-decorated Tudor, as it’s mostly machine sewing. Luckily that’s what had always been planned.
I cut out the ruff and collar for the partlet last night, and will be stitching it in the car on the way to Yass, while at our friend’s house (they are also in the SCA and one member of the house is a costuming apprentice, so it’s not as rude as it sounds) and on the way back. Luckily I don’t get car-sick so there’s 6 hours when Iwould otherwise doing nothing. The ruff and partlet is going to be made from some organza that had previously been the veil for my hennin. The partlet will also be made of this, with concertina pleats around the chest as per the painting. I’m not entirely sure on dimensions for this yet, but I’ll work it out. The ruff pattern and construction is taken directly from Drea Leed’s Easy 1560s Ruff which seems to achieve the look I am want for Fitz’s ruff, and probably for mine too as mine will be quite small. I’ll let you know how it goes next week.
1 December 2004
Photos!! Not as many as I’d hoped to show you. The disposable camera project worked well as long as I remembered one thing-to use the flash at all times, no matter what the light. Unfortunately I know that now I’ve have the photos back, a total of 10 from a roll of 27. The ones I lost were the pictures of my current two projects. So I have only two photos for each, rather than six or seven.
Here’s two photos of my underpinnings taken on the night when we first checked the hem length etc. As you can see the forepart of the kirtle is bagging in a strange fashion, and the hem is too short. This is in the process of being fixed. Otherwise I like these pictures, the silhouette is good, which is the most important thing. apologies on the quality, it’s a result of the disposable camera.